Showing posts with label 3d model. Show all posts

Tuesday, 11 July 2017

Seriously?


Seriously? is my new short animation. Working in my favorite theme sci-fi it's set on a giant alien spaceship and shows the interaction of two of the inhabitants. There is love in the air....and on the floor and in your face. I asked my daughter for an idea for a short, she gave me nothing for hours saying she was thinking and then came up with a two sentence idea and Seriously? was the result.

Why so serious? ......BECAUSE!


My first job was to build a new character, My little green man #1. I wanted to do something cartoony and cute with appeal and simplicity. It took me a couple of tries as my first version was ugly, I like to sculpt my characters with lots of detail but it turned out that less was more. Simple rounded shapes made the character look cuter.
That's what I call UV mapping SERIOUSLY!
Surface of the model laid out for painting
Maya base mesh to Zbrush sculpt to render
Maya base model to Zbrush to texture test


That's a serious pose there....
Serious pose done in Maya rendered with 3Delight

My next job was to create an animatic. An animatic is a very rough version of the film where you can see the intended actions and camera shots but animation is very basic, just enough to show what happens.


So once you have your animatic it's basically a case of refining until you have your final animation version. You can see that while I was animating I had a placeholder background. I put the final version of the background in after the animation was done. Next I will show you an early version of the animation.


In that version you can see the animation is quite rough, some of the last shots look very different in the final version. There is no sound, the sound was worked on by my good friend Rafa Tomás Velázquez who was my house mate in Dublin. He is a talented guy and you can see more of his work over at Farmode .

Once I had finished the animation the last step was rendering I used 3Delight for the final render but I also tried Mental Ray and Renderman.


Seriously rendered with Renderman
Renderman as used by Pixar........not really working for me :(

Seriously rendered with mental Ray
Mental Ray looked very nice but .....wasn't free :(

Seriously Title
3Delight saves the day 


Rendering was a headache, I set up all my lights with and did all my tests with 3Delight, it kept crashing on me but I thought it should be all right when I rendered a full sequence a batch render........it wasn't. This lead me to try the other two, Mental Ray is what I have most experience with but at first it wasn't running. After poking around on the internet I found a solution and got it working and it looked great...........but I didn't realize you had to pay if you want it to batch render. You can render stills but to render a sequence you have to buy it. 

Renderman to the rescue! Pixar use it it must be amazing!...........WADDAYA MEAN IT TAKES 10 MINUTES TO RENDER A FRAME!!! Erm....yeah so seems my laptop is not Pixar ready, I could only get very ugly results with my background in Renderman. Back to the drawing board. Luckily in picking through my scene so many times to set it up for the different rendering programs I discovered my camera was corrupt. This was what was causing 3Delight to crash and after that everything went smoothly.

It would be great if people could share this post and the film, I would love Seriously? to get a big audience.

Be seeing you! Seriously!
Be seeing you!

Friday, 27 November 2015

Shotgun 3d model

Shotgun Pump Action

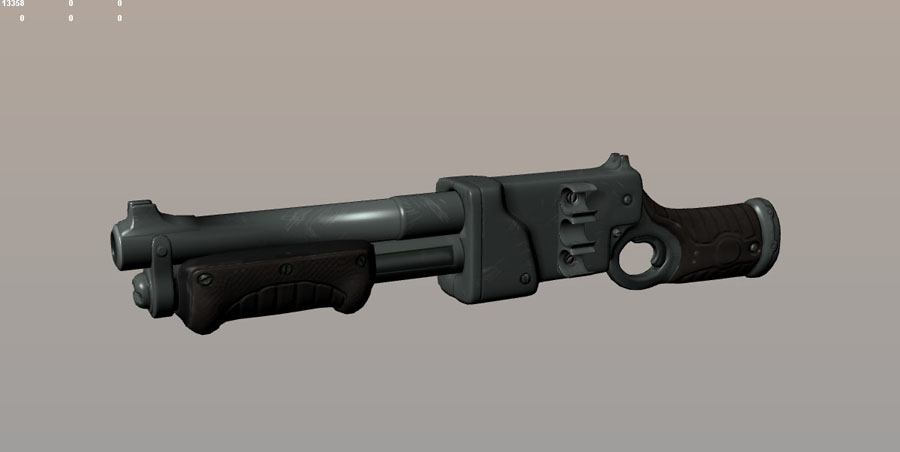
Here is my new Pump Action Shotgun model available from Turbosquid now. You can get it for Maya, Max, in fbx, or obj format. It's a polygonal model coming in at  faces 7519  verts 7485 for the shotgun with three cartridge models included. If you go over to turbosquid you can see a little animation of the shotgun pump action firing and ejecting shells.


I'm going to talk here a little about how I built the model and converting it from Maya to Max.
Shotgun base mesh in Maya
Maya Low poly shotgun
 I started out with a low poly base mesh which I built in Maya I then UV mapped the low poly model. I decided to have a look around to see if I could find a better UV mapping solution for this model. I normally make organic models and have been using Zbrushes UV master but it's no good for mechanical stuff like the shotgun. I ended up using Roadkill, it's a good program for low polygon. I also tried Maya's unfold but found it to be so loaded with bugs that it was unworkable.

Roadkill shotgun UV mapped showing UV islands
Shotgun in Roadkill for UV mapping

Once this was done I exported the model as an obj and brought it into Zbrush for detailing. I separated the model into a number of subtools so that I could get a higher level of detail into the model.


Base model in Zbrush
Below are my high poly Zbrush sculpts with a shiny material on them so they look pretty. I found it quite hard to sculpt a mechanical object like this, but the idea was to push myself specifically into a hard surface object and I learnt a lot from it.


The next step for me was to get normal maps from the high poly sculpt onto a lower poly version of the shotgun. For this step I used xNormal which I have been using for a while and for me it seems the most reliable tool for this. As I had a number of subtools and because some areas of the shotgun overlap I used my subtools to normal map the shotgun in sections that fit into one texture page when assembled (if you look at the Roadkill screen shot you can see my texture page). Overlapping objects in normal mapping will cause errors if not dealt with separately.

This is where things went wrong..................
I had some ugly texture stretching going on which you can see above. The strange saw tooth effect showing on the piece above is pixelation on a normal map. What I did to fix this was re-map the shotgun at a higher poly division and also I altered my UV islands. I also rebuilt the barrel and used edge creasing in Zbrush to keep my edges sharp. The rifle butt needed re sculpting as I didn't have enough geometry in my low poly to make my original version work. All useful things to learn, edge creasing in Zbrush is an easy way to keep your crisp edges. For mechanical objects it's better to be generous with your low poly when it comes to curved areas like the rifle barrel. I discovered that Roadkill does not cope with higher poly models and ended up mapping the shotgun in sections, it wasn't too bad, I used the subtool division from Zbrush.


Next step texturng. Above is an early base colour version. You can see the barrel has changed from the Zbrush version. Below is the altered mapping from the higher poly division shotgun.

One more thing I wanted to share, as it drove me up the wall. This is the first model that I have converted to Max. It's pretty simple for a model like this which is just geometry with some separate parts. I exported the model as an obj. I learnt that to keep my pivot points accurate I needed to export all elements from the origin. I learnt how to rebuild my materials in Max, all pretty straight forward........until normal map seams!

The horror!

I'm going to run through what happened and how I solved it starting with setting up the normal map slot in the material. The first step is to go to the maps section of the material. Set the bump map amount to 100, default is 30. Next click the map button marked none, select "Normal Bump" from the Material/Map Browser. Now select the normal texture node.
Normal Map set up in Max help images for setting up your normal map texture file
Select the Normal slot marked none and pick bitmap from the Material/Map Browser. Lastly and here is the fix. Once you have navigated to your normal map texture file go to the gamma option, select override and set it to 1 as shown in the image below. The problem is due to Max's default gamma option being set to 2 which gives you your seams.
Max gamma fix for normal map seams which options to use
I had to do lots of googeling to get to the bottom of that one, so I hope this will help others with there normal map woes. Typical Max that the default value doesn't work.
Fixed!
I could also tell you a thing or three about shotgun calibre, imperial to metric but I think it might be too exciting for you (sarcasm).

Shotgun pump actionShotgun Wireframe